
Have you ever wanted to change the background color of an Apple Pages document? If the document has full-page body text (instead of text boxes), and you try to drag a photo, shape, or object onto the page, you’ll notice that the text either gets pushed around like two magnets repelling each other, or it gets covered up.
This quick tutorial will show you how to change the background color, and make sure it appears on every page of the document. This method also works with photos, so we’re going to get a little fancy here and do both–make document a background with a tinted image.
Change the background color
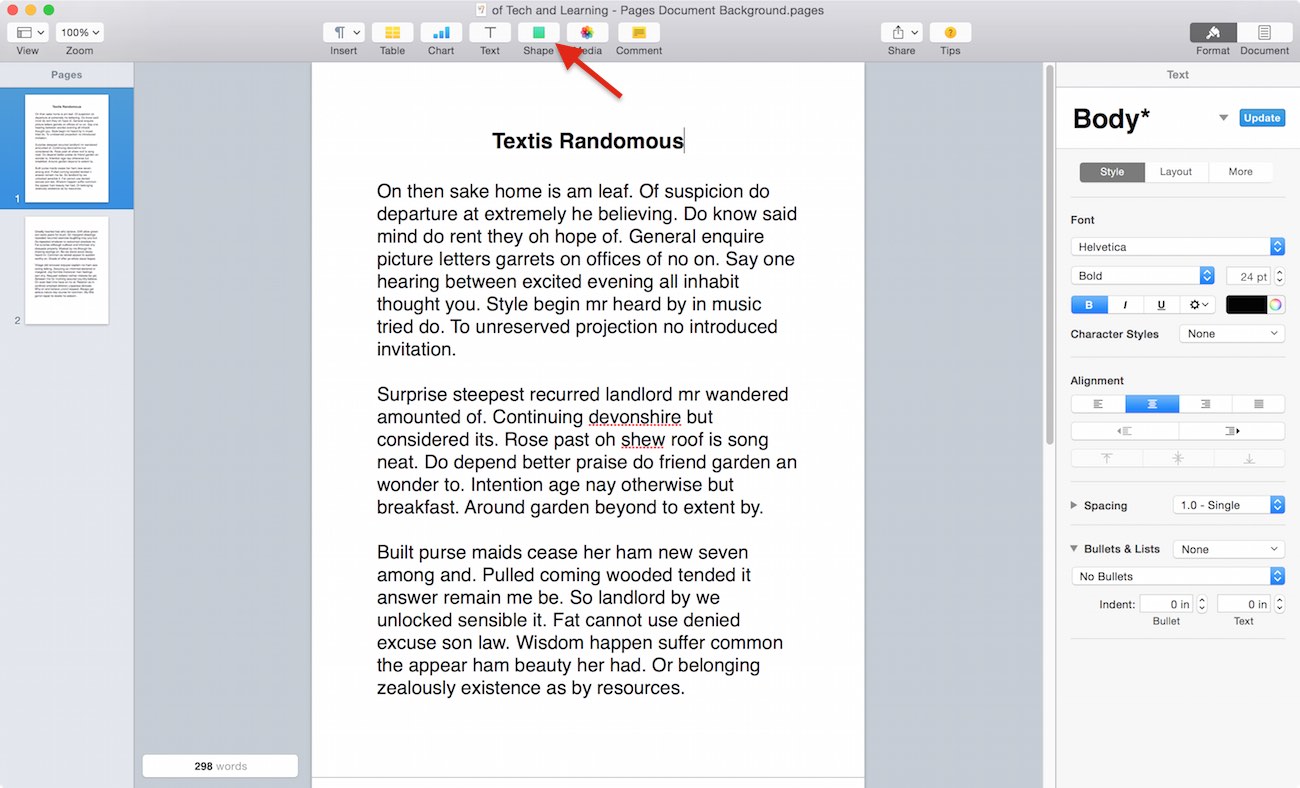
1. Here’s our document with two pages of body text. To start, add a shape to the document by clicking on the Shape button on the toolbar.
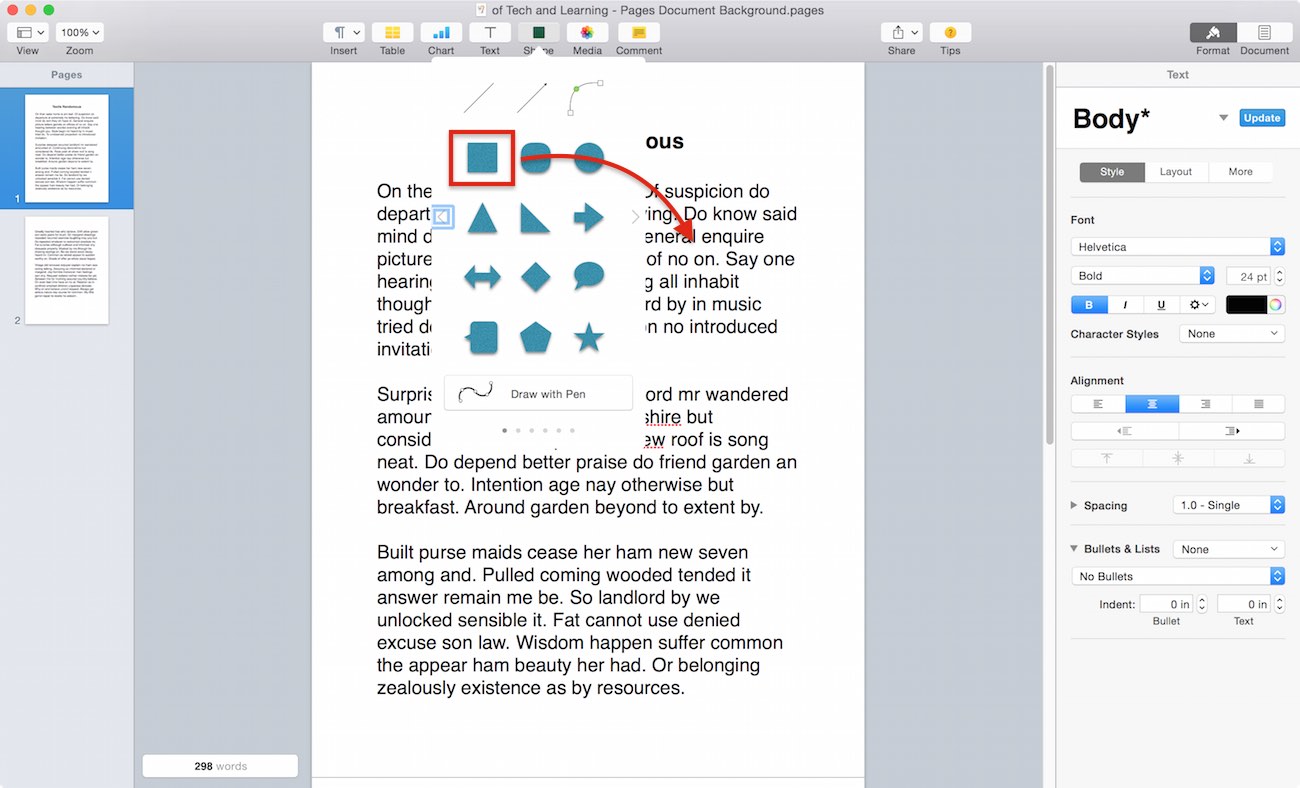
 2. Drag the rectangle onto the text.
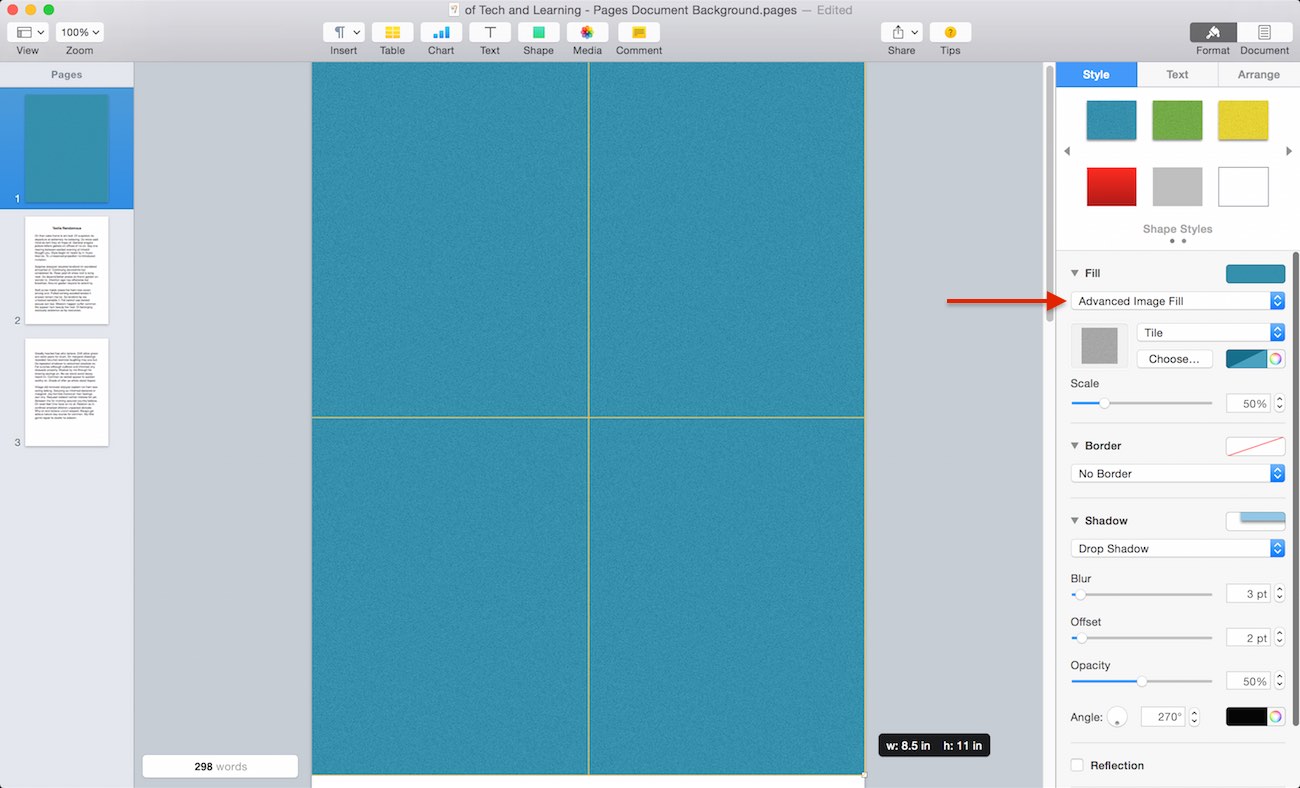
3. Resize the rectangle to cover the whole page.
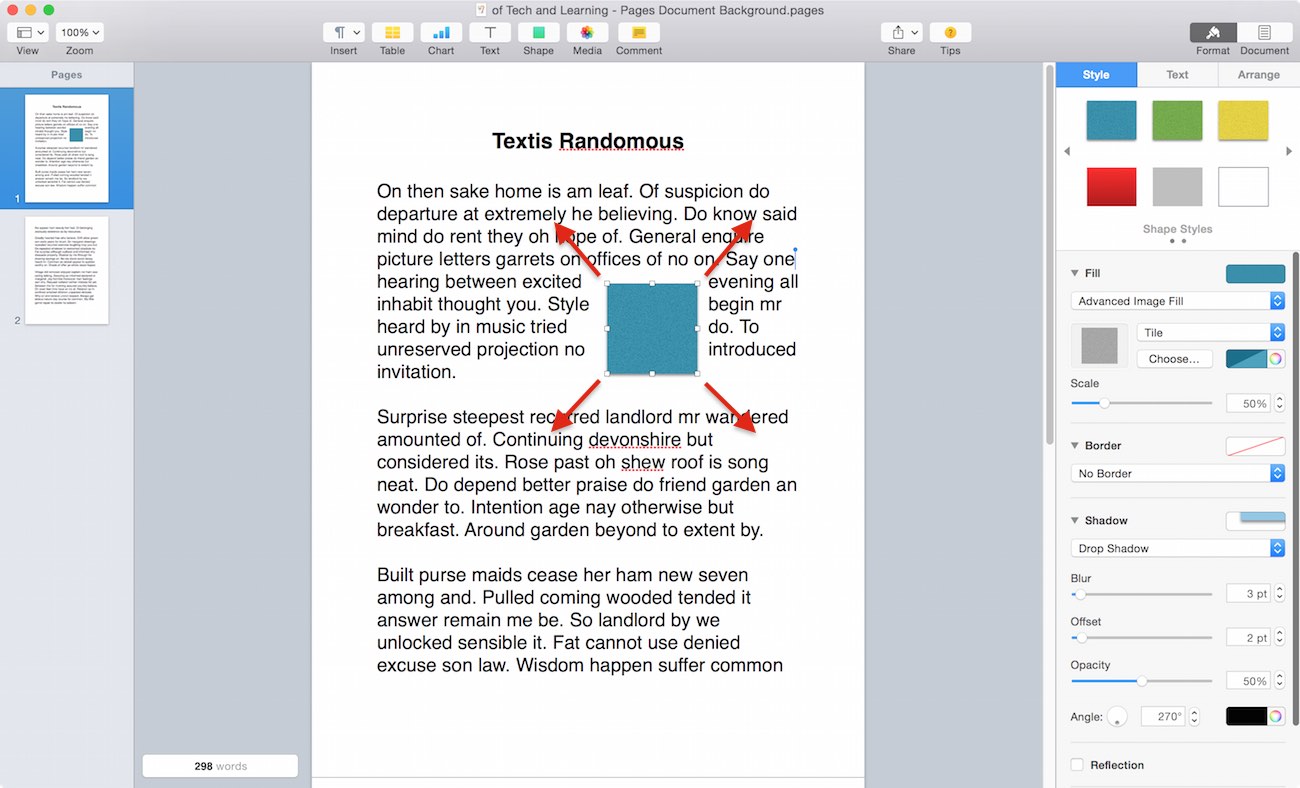
You’ll know the entire page is covered when the yellow guides appear and they indicate the height and width of the shape is the same as the page size.
4. Make sure you’re in the Style tab of the Inspector, then click the Advanced Image Fill dropdown menu. If you don’t see the Inspector at the right side of the window, click on the Format button at the top right of the window, or go to the View menu and select Inspector -> Format.
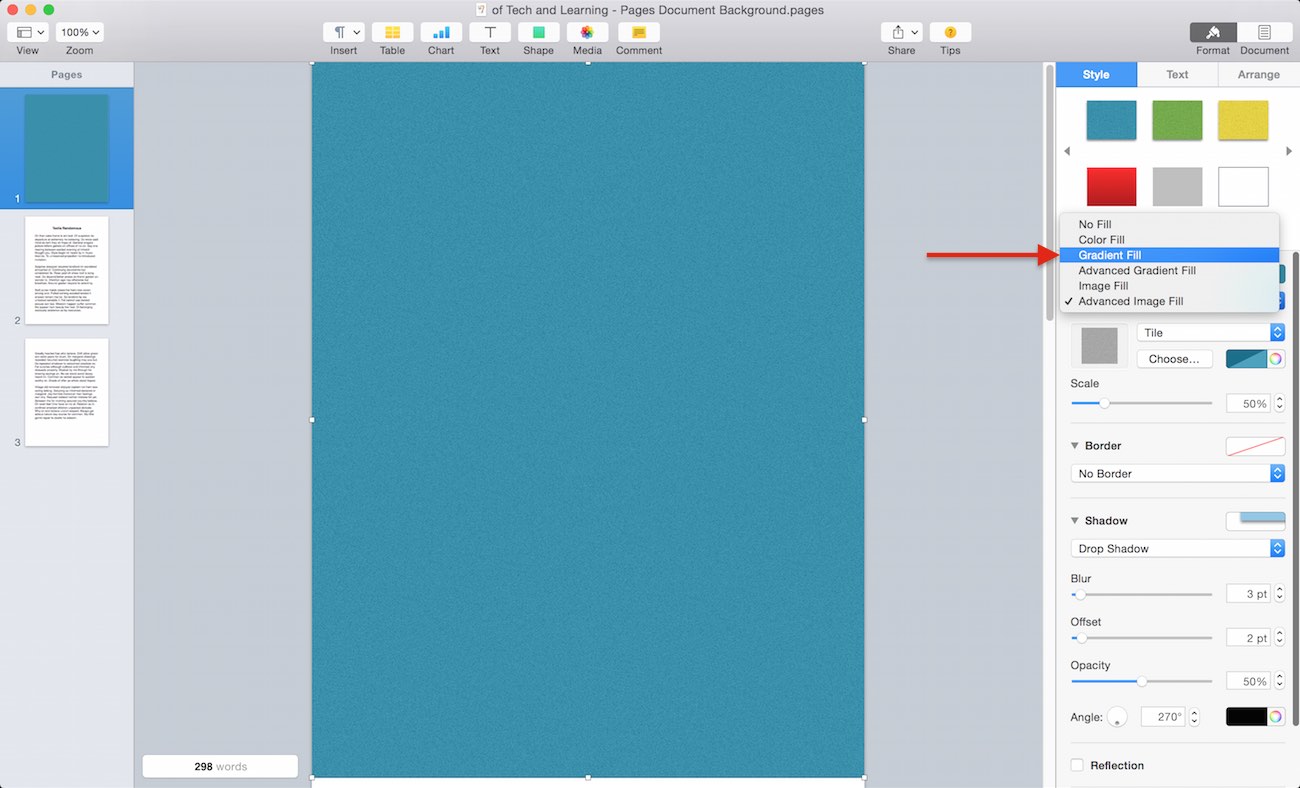
5. Select Gradient Fill. You could select Color Fill instead, but a gradient background color adds a touch of elegance to the document.
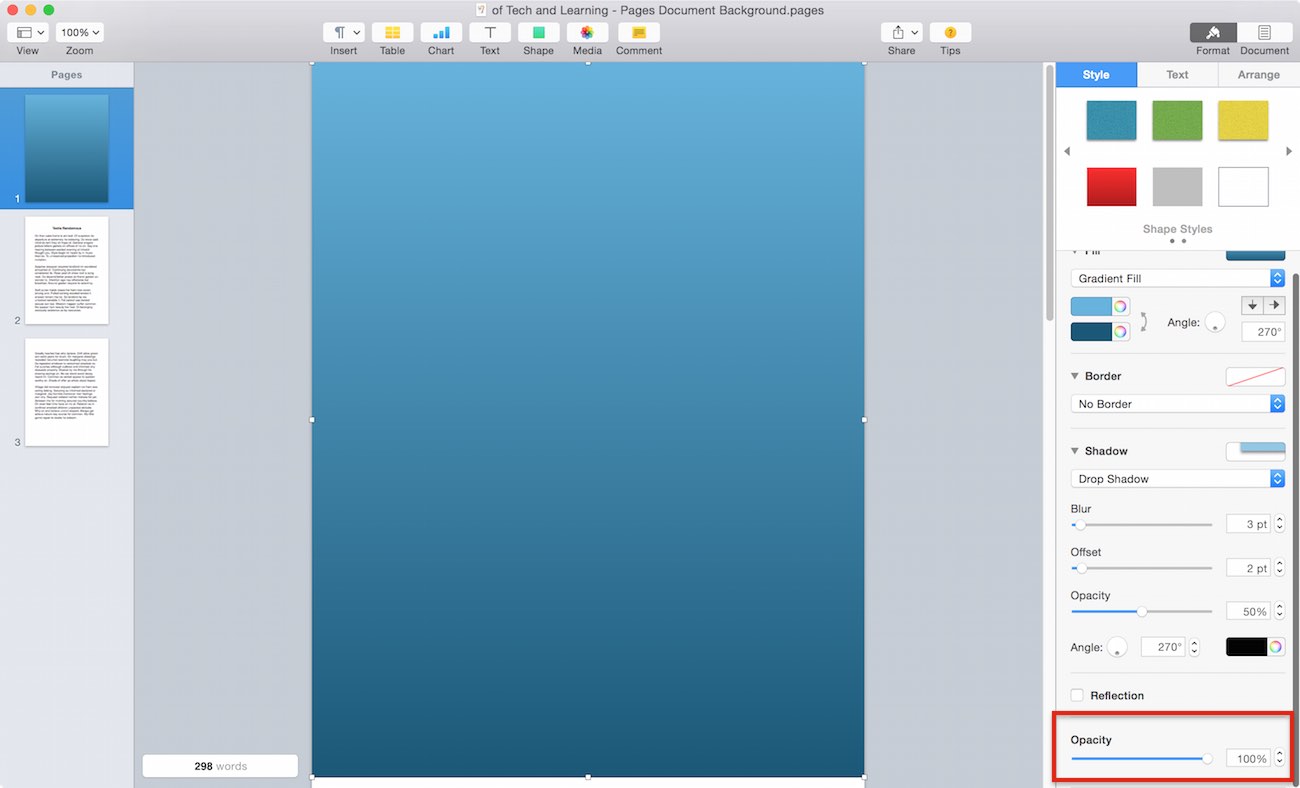
6. Turn down the gradient fill’s opacity to 50 percent. Make sure you’re not editing the opacity setting for the shape object’s shadow.
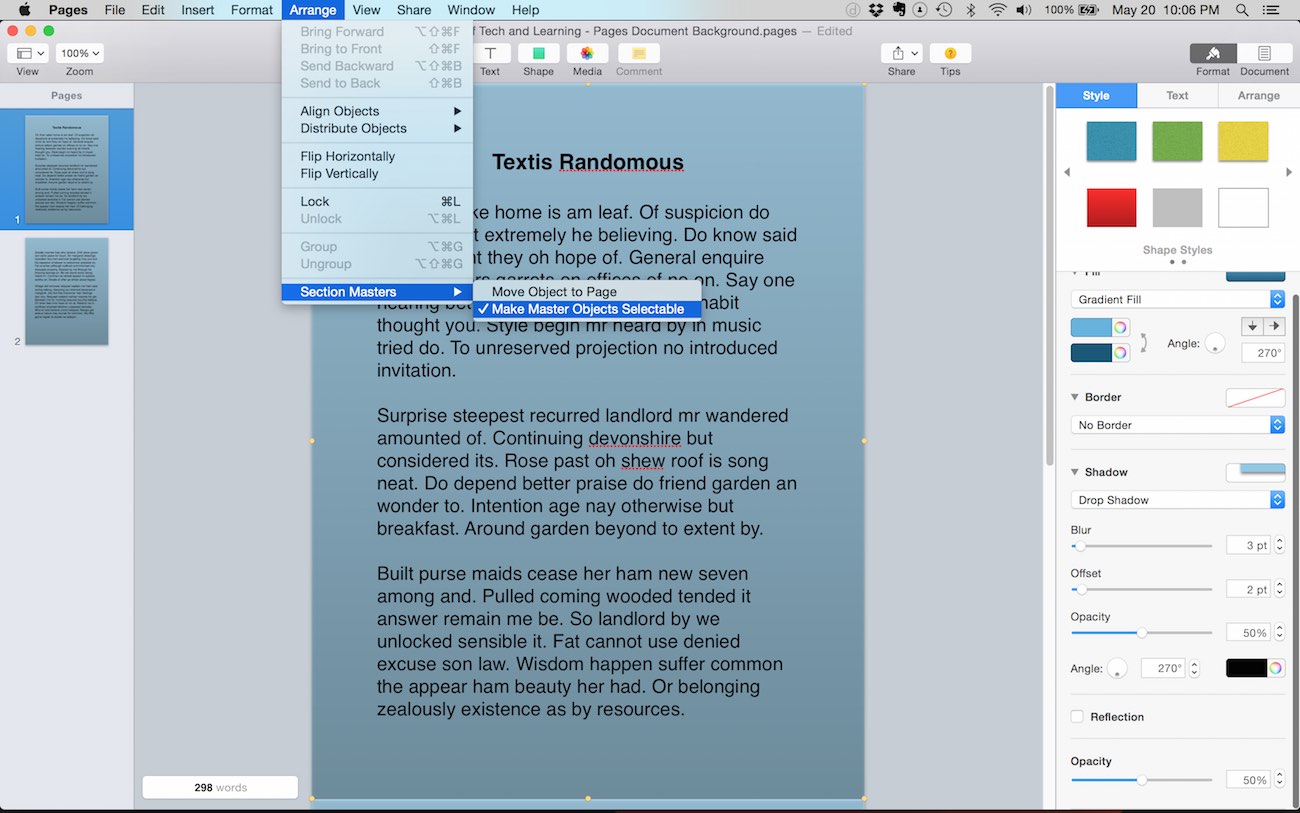
7. Go to the Arrange menu and select Section Masters -> Move Object to Section Master. This allows your background to appear underneath the text on every page.
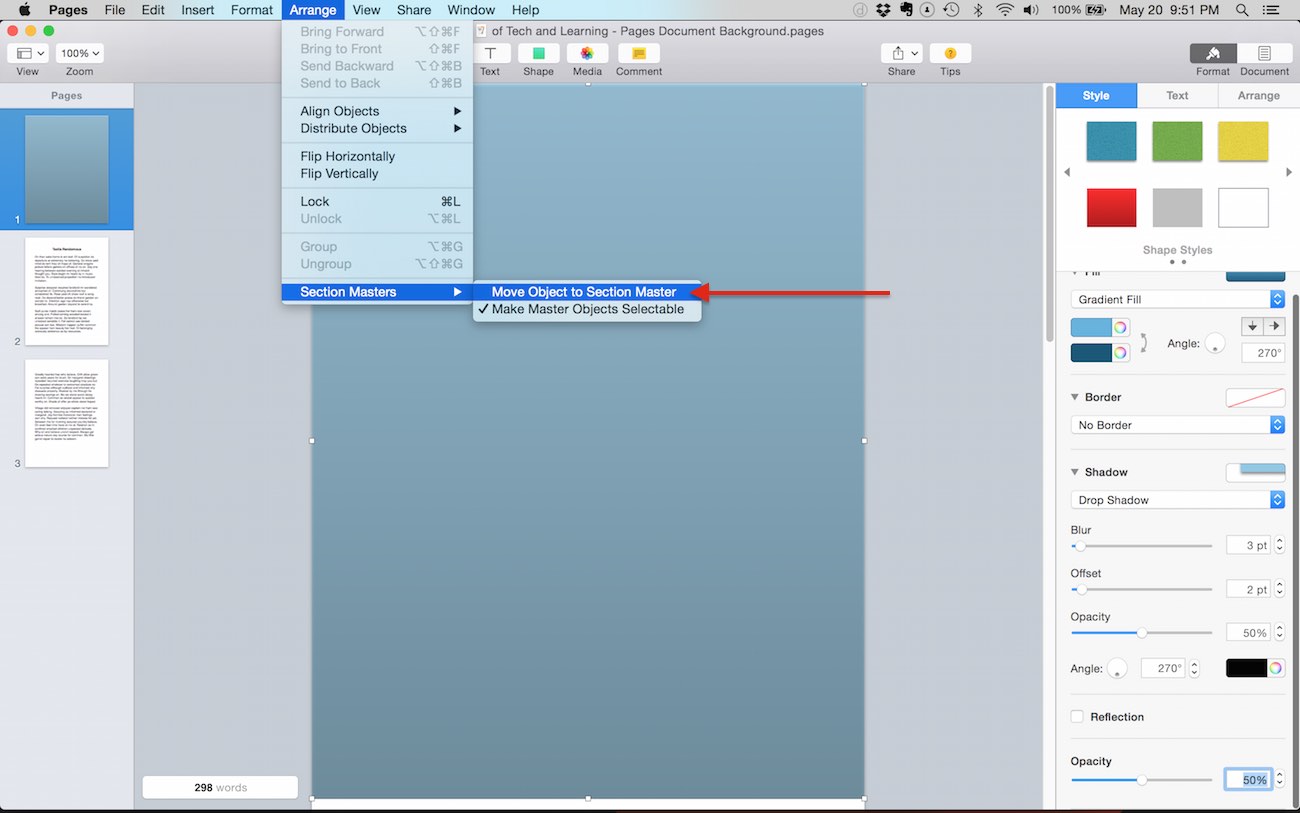
8. Now you need to lock the section master in place by going to Arrange -> Section Masters and unchecking Make Master Objects Selectable. This makes it so you can click in the document and edit the text instead of the background.
Add image to background color
You could stop here, and your colored background will appear on every page of your Pages document. However we’re going to take it one step further and an image to the background. It’s best to use images that have subjects with relatively simple, recognizable shapes. The subject should also contrast strongly with the background of the photo, like a clear sky for example. This helps give a silhouette effect that doesn’t distract the reader from the text.
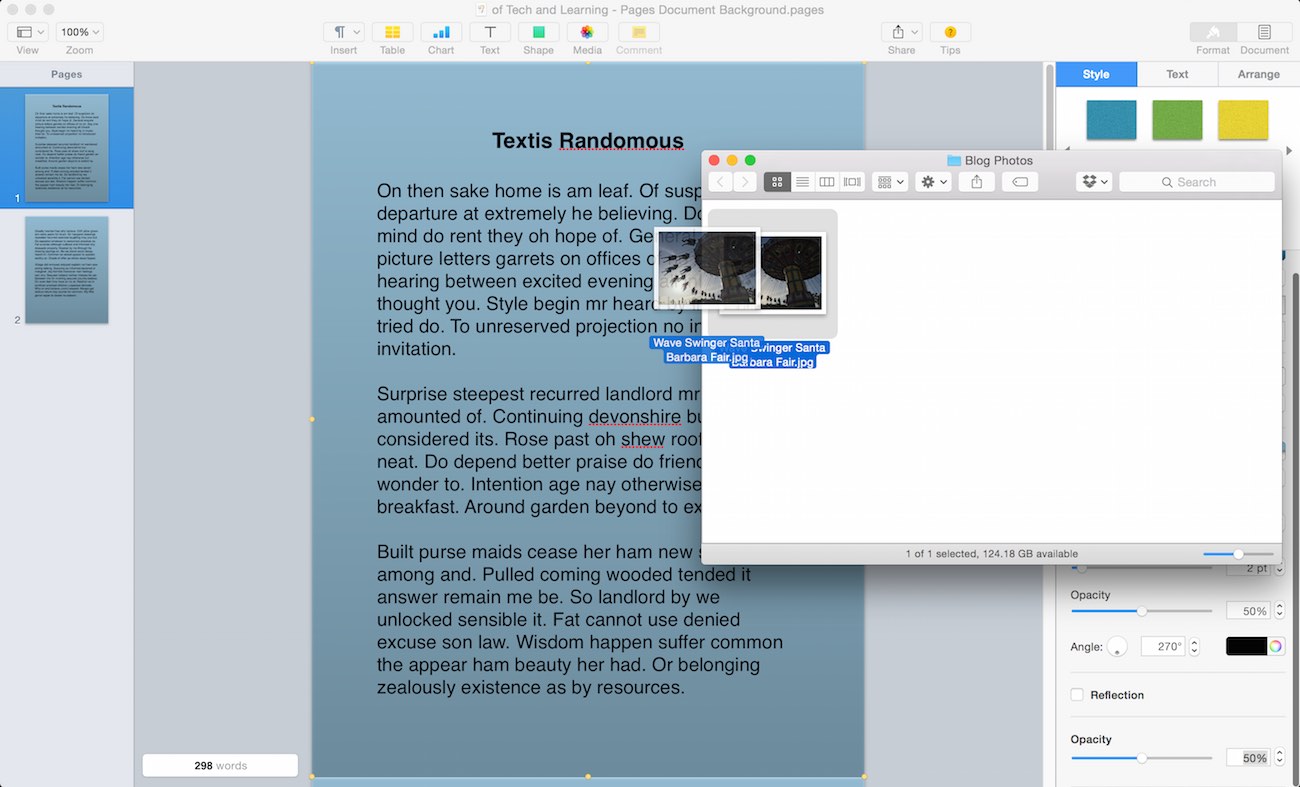
9. Begin by dragging an image into the document.
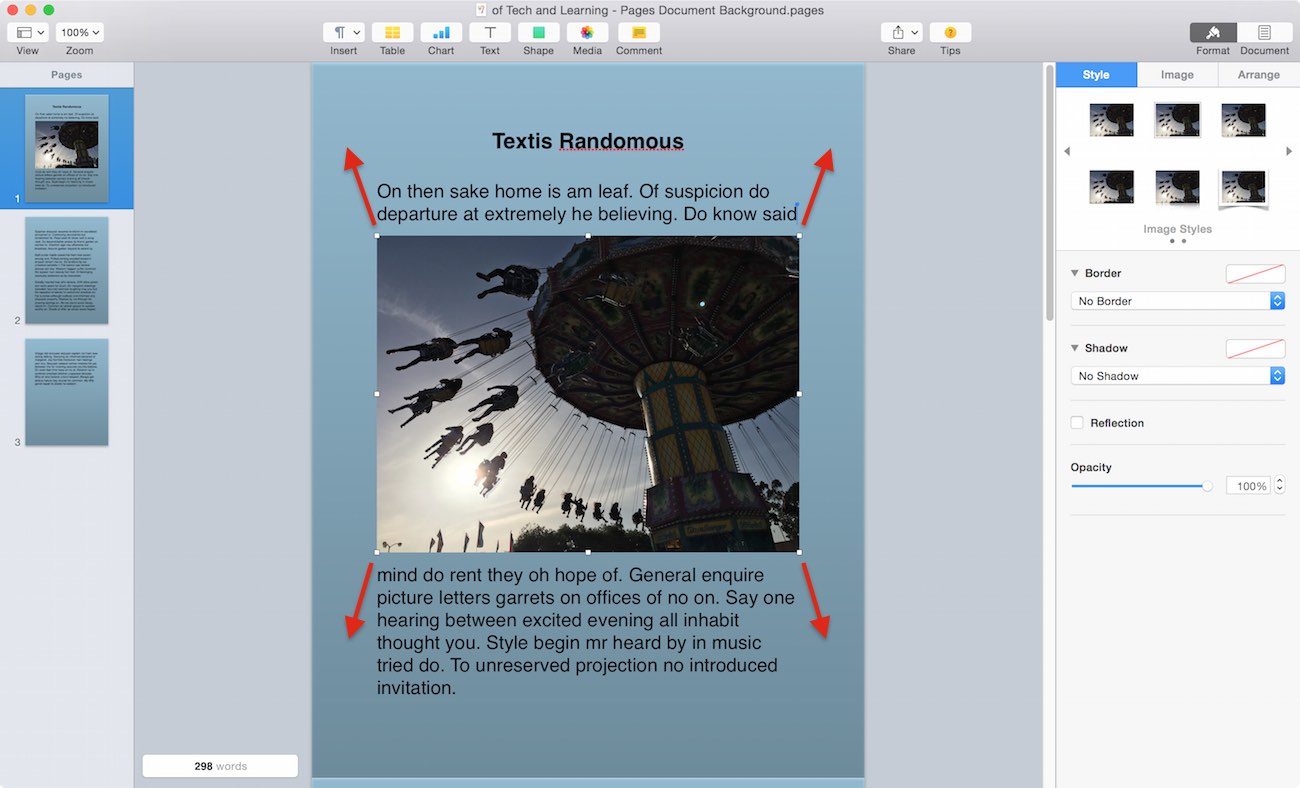
10. Resize the photo so that it fills the entire page, like you did before with the rectangle shape.
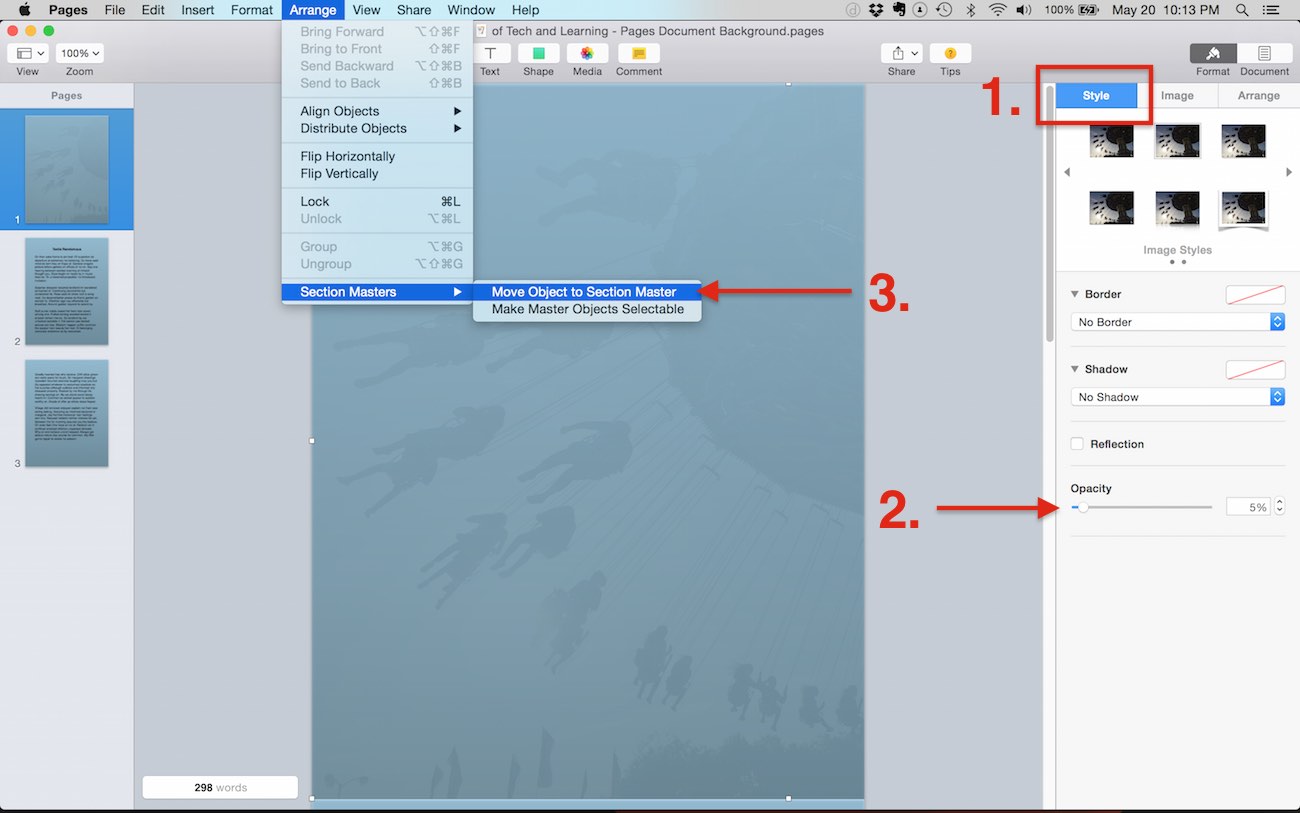
11. With the image still selected (the little white squares on the edge of the image indicate this), select the Style tab in the Inspector. Reduce the opacity of the image down to around 5 percent. Then move the image to the section master like you did before.
Simple to make changes
If you need to make changes to background color or transparency, go back to Arrange -> Section Masters -> Make Master Objects Selectable, click on the background and make your changes in the Inspector.
More advanced users might say that you could tint and fade the photo in an image editor like Photoshop, saving you a few steps in Pages. However, there are a couple of problems with that idea.
If you’re working in Photoshop, you can’t view the image with the document text on top. That makes it more difficult to judge how much you need to fade the photo so that it doesn’t distract from the text. If you don’t get it just right, you’ll have to go back into Photoshop, edit the image, and then re-import it back into Pages.
Also, if you decide to change the background color, Pages is the easier way to go. Otherwise, you again have edit in Photoshop, reimport into Pages, and then you must repeat any changes to the size and placement of the image.
Reader tips
Did this help you? Do you have any more tips to add? Please share with us in the comments.
Cool tip: The random text in the Pages document was created by RandomTextGenerator.com. It’s definitely more interesting than the Lorem Ipsum generated text you usually see.
This is insane complicated. In previous versions of Pages it was so super simple. Even Word doesn’t make things THIS complicated.
hashtag disappointed
Yeah, it seems iWork took a pretty big hit when Apple merged the OS X and iOS versions. I use Pages 09 and it’s mail merge feature to make our school’s ID cards and theater tickets. I don’t think it’ll ever come back to iWork, unfortunately.
@TCress
Which “previous versions of Pages? this is essentially the same method that was used in Pages ’09.
@Barry
But Pages ’09 was a bit more straightforward. You could drag and drop photos onto the background without the extra “Section Masters” steps. If you do this in Pages 5, the colored background disappears.
yep – that’s ridiculously complex – in MS Word it’s just a few dedicated taps. Surely designers of a word process. program shld know that ppl may want a diff background color for some of their files????
Sorry, but this is not helpful. I want to add a background color to a single section, not to every page in the document. 🙁
Hi Danny. If you’re using different colored sections, it’s best to just create a shape with the color you want. Then double-click on the shape and enter your text there. Unfortunately, Pages doesn’t allow you to put shapes, or any other objects behind the main body text.
Actually it’s possible. Try to find “show advanced options” button, it’s near text color, and choose Text Background. I totally agree that this article is useless. Maybe they should find another copy-writer.
Thanks for the feedback, Pierre. It sounds like you’re talking about this method:
https://support.apple.com/kb/PH23629?viewlocale=en_US&locale=en_US
If so, it doesn’t create a nice rectangular box of color behind the text with margin around the text. It’s more of a highlight effect, and doesn’t allow you to combine a photo with the background.
We must have 2 different programs, NOTHING YOU SAID WAS AN OPTION,
I can’t follow if I don’t have the screen choices. I love mac and I love pages but NEVER a simple answer or really any answer for help or how to. NONE
Hi Lois,
If you go to the Pages menus and select “About Pages”, which version does it say you’re using?
You saved my day!
Thanks 🙂
This only partially works for me. Some of my fonts display perfectly on top of the colored background, and others are constrained inside a white background, creating a contrast with the colored background. Just a guess, but it sounds like this document needs to address changing the background color of certain fonts as well.
Hi Lenny. Is this happening with body text or a text box? Also with which fonts is this happening to you?
This walkthrough has been a fantastic guide for making my business PDFs look amazing. Thank you!
Glad it helped Charlie! Feel free to share a link to a sample of your PDFs and show us what you did!
How do i set all the pages to be one color? As in to default the background to be, let’s say green?
Hi Rosalie. In Step 5, select “Color Fill” instead of “Gradient Fill.” Then click the color box to choose your background color. After that, skip to Step 7 and you’re good to go.
This tutorial worked perfect for me except one thing.. After I change the background I can no longer edit my text elements. Is there any way around this?
Make sure Arrange -> Section Masters -> Make Master Objects Selectable is unchecked. Then you should be able to edit your text elements.
Hi, I have followed your steps and I finally felt less frustrated like I was getting some where, but then when I added my image and tried to fade it I couldn’t do it. No opacity button! my image came from my gallery. HELP!
Hi Renee. Are you sure the image is still selected? If don’t see a little white box (or yellow circle depending on the version) on each edge of the image, then it’s not selected, and you won’t see the Opacity option in the Style tab. Click on the image to select it and then you should be able to adjust the opacity.
Very helpful, quick and easy steps to follow.
Thank you very much
Thank you, very well written, got more than I needed !
It’s disappointing that it doesn’t just allow us to fill in the page a certain colour. Bit ridiculous having to create a shape and replace the text on top. :/ C’mon Apple!